The Gear
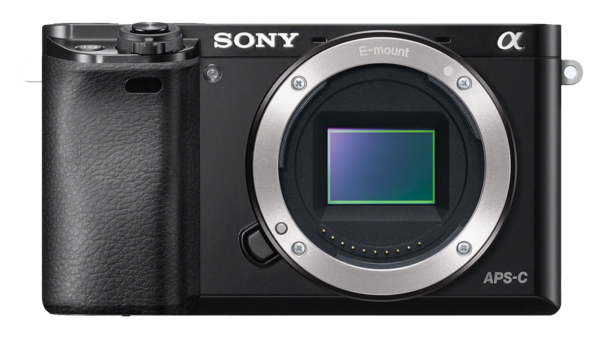
Camera: Sony A6000
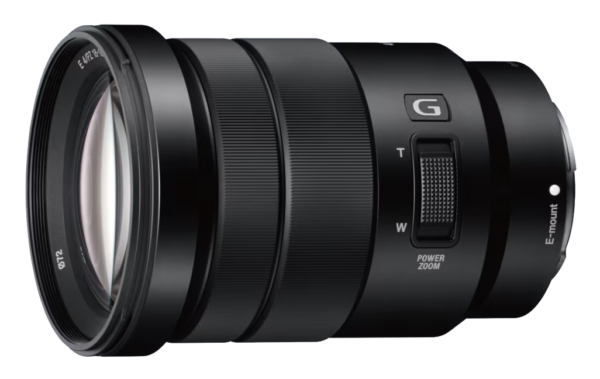
Main Lens: Sony G 18-105 f4 OSS
Macro Lens: Sigma Macro 105mm F2.8 Lens for Nikon Digital (Adapted to Sony E-mount)

The Software
Adobe Lightroom – Managing Shoots, Colour Grading, Exporting for the Web
Adobe Photoshop – Special Effects, Typography, etc…
Adobe InDesign – Making products (calendars, magazines, photobooks, etc…)
Notion – Planning and time keeping


How I use the Gear
The most important thing for me to think about while taking my pictures is the composition, I can rely pretty heavily on shooting in RAW and not fully compensate for exposure changes in camera, though I do try my best when a scene is not time sensitive. However, if I know that I will miss the shot if I worry too much about my exposure I just try to keep within +/- 1.5 EV to ensure I do not lose details in my shadows or highlights.
While taking pictures I will often take a small burst each time, this is to compensate for partially focus breathing but also unintentional movement during handheld shots, when I have time and space to carry a tripod, I will instead set my camera on a tripod and then use a shutter timer function to ensure by the time I have pressed the shutter and moved away from the camera it has stopped shaking before it then takes the photo (2 seconds or so later).
How I use the Software
Once I have finished a shoot I will copy the contents of my SD Card to my SSD and then I will import the photos from the SSD into Lightroom and then export the full shoot at web quality to put on my website. Once I have done this I can start editing my favourite pictures from that shoot.
When it comes to editing my main focus at first is getting the exposure how I want it, sometimes this means blowing out the highlights at first to make for a brighter image but that is fine, I can bring them back in by just pulling down the highlights slider later, but there is a balance. I have to feather between bringing the shadows out with the contrast and completely losing my highlight details. Once I have gotten the exposure of an image looking pretty good I will move onto making sure the colour temperature is right, I have learnt from making the mistake, DO NOT change your colour temperature to get a warmer image. If you do change the temperature of an image to make for a warmer image you will get your warmer image but you will also throw off all your colours and skin tones, making for a very unnatural look, I made this mistake plenty of times which can be seen in my previous edits. Now for some of my images I may take a slightly larger frame than I actually wanted, so in these cases I will just crop in slightly. But sometimes I find that I can get 3 different images out of just one frame! With a 24MP sensor in my camera and a relatively sharp lens I am able to get stunning pictures even when heavily cropped in.
So once I have dialed in the colour temperature of an image and reframed it if needed, I will then move onto doing some colour grading using the colour wheels. I often find that I want a little more green/blue in the shadows of shaded images, it gives for a slightly cooler look in the shadows and makes them feel darker than they are. I then will sometimes add orange/red/yellow to the midtones and highlights if I want a warmer image, this can sometimes work but other times can destroy an image’s colours. So instead of using the colour wheels to make a warmer image I will often take to the HSL sliders and mess around with the luminance and saturation of colours separately. Using the HSL sliders is a great way to make a really saturated and colourful image without completely destroying the natural look, while some photos of more industrial places can look okay with just boosting the overall saturation or vibrance of an image for nature this just destroys the images and make them feel off (my opinion).
So what now..? Well often I will want to mask an image using the masking tool in the Lightroom Develop tab. This tool allows me to select certain regions of my images and effect just them instead of having to have a global edit that just looks okay this allows me to go in and select singular patches of an image or do smart selections based on objects, landscapes, mountains, the sky and even starting to get into effecting just a certain luminance range. These masks allow me to fully control any part of my image separately, which is great for large landscape photos where you maybe overexposed the sky slightly as a sacrifice for getting more detail in the shadows of under some trees. Using masks I can select the sky and tame its exposure, bringing loads of detail back. Now what about annoyances in an image, say I took a picture of a beautiful landscape, but I have 3 walkers going through in the corner of the image, it’s a distraction. So yes I could just crop the image and remove them that way or I could use Lightroom’s built in removal tool. With the addition of their AI object detection and then removal, I don’t have to worry about distractions when I take a picture, I can always know that once I get my picture into Lightroom I will be able to remove any little annoyances with ease.
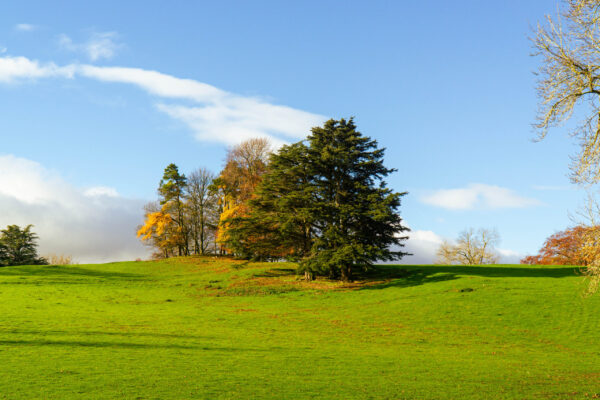
Using Lightroom to Enhance an image
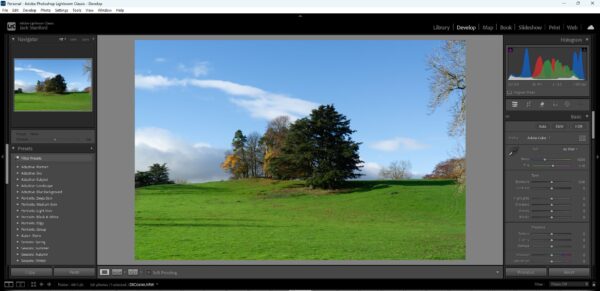
First of all I pick the image that I want to work with.
I then adjust the Exposure and overall lighting of the image. I change the exposure, highlights, shadows and contrast to help create a bright image that still holds details.
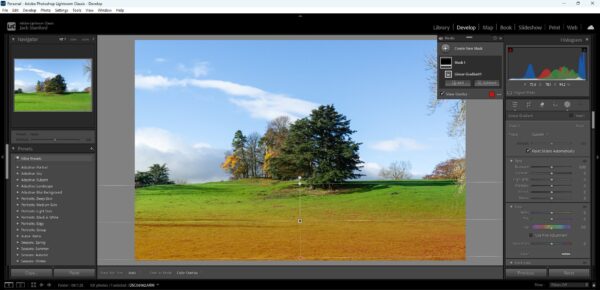
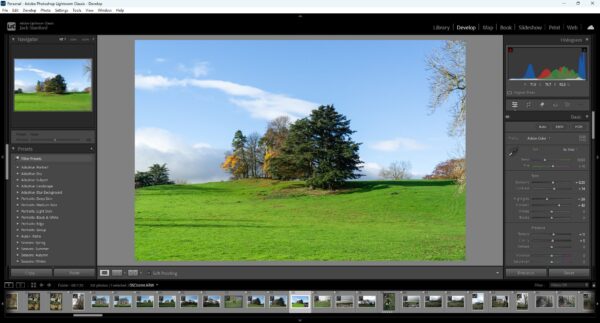
Once I have done the inital overall lighting and exposure I then move to masking some of the distracting areas of the image or otherwise areas that need attention. In this image I thought the grass at the very front of the frame was quite distracting being how bright and sharp it was. Therefore I darkened it using the Exposure slider and then also removed some clarity from it.

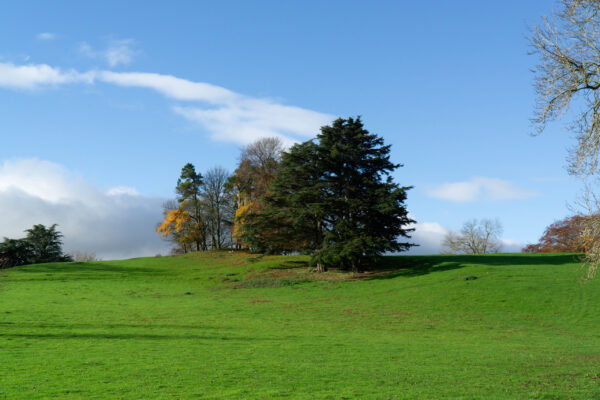
Here is what the image looks like after adding that mask. You can see the grass in the foreground is slightly softer and is less lit.
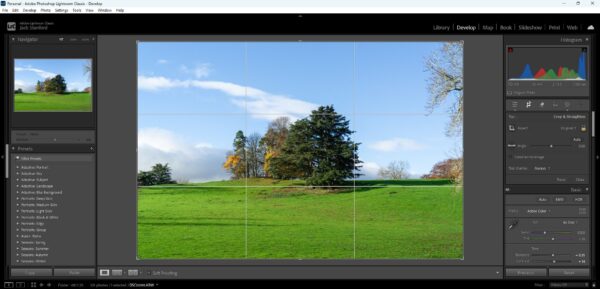
I then moved onto crop and rotate, I didn’t do much here just slightly rotated the image to be in line with the horizon which very slightly cropped in so I moved the image over to the right to ensure to not cut off the branches on the right hand side anymore as I feel if they become anymore cut off than they already are they will unbalance the image and make them feel less intentional.
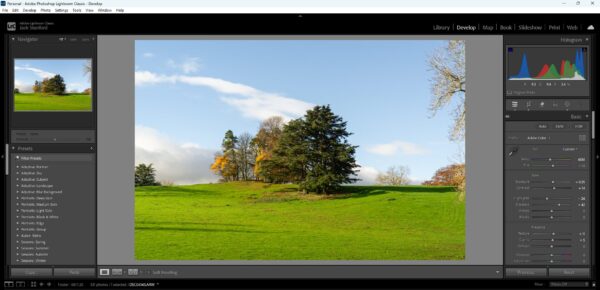
I thought that the image looked a tiny bit cold for being during autumn, so I increased the colour temperature of the overall image, helping bring out the vivid oranges and yellows.

To further emphasise the autumn colours I did some colour grading to really help warm up the image and make it feel more alive.
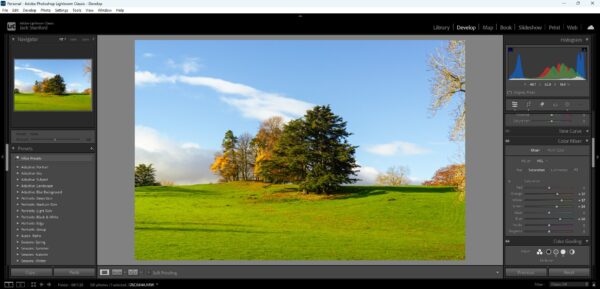

I then also used the colour mixer to boost the saturation and luminence of only certain colours. By doing this I can adjust how much certain colours pop off the screen and this is a really good way to add more colour to an image without just increasing it’s overall saturation.
Final Image vs Original
Why I have made the choice to work in this way
I have chosen to work in this way because it allows me to prioritise composition, timing and creative intent while still maintaining technical control over my images. By shooting in RAW and keeping my exposure within an acceptable range, I am able to respond quickly to changing scenes without missing opportunities due to over-adjusting camera settings. This approach ensures that important detail is retained in both the highlights and shadows, giving me greater flexibility during post-production.
My shooting techniques, such as using short bursts or a tripod with a shutter timer, help to reduce issues caused by camera movement or focus inconsistencies. This means I can concentrate on framing and subject matter during the shoot, knowing that I will have technically sound images to work from later. These decisions reflect a practical understanding of how to adapt my working methods depending on time, location and conditions.
In post-production, my workflow is designed to refine and enhance images rather than fundamentally alter them. I begin by correcting exposure and colour temperature to ensure accuracy and consistency, before using tools such as cropping, colour grading, masking and selective adjustments to improve balance and visual impact. I use these techniques carefully to maintain a natural appearance, particularly in landscape photography, where unrealistic colour or excessive saturation can distract from the scene.
Overall, this method of working supports my photographic aims by combining efficient shooting techniques with controlled and purposeful editing. It allows me to develop images that reflect my original intentions, while demonstrating a clear understanding of both technical processes and creative decision-making.